
Oh boy, it’s really been two whole years since the last post, hasn’t it? Frankly, I’m surprised I’m actually reviving this blog at all, but not too long ago, a certain fan of mine contacted me via e-mail to express a vested interest in and enjoyment of just about everything I do — including the more obscure things I didn’t really do for anyone other than myself — and, as a result, single-handedly reignited some interests and passions I had thought long lost.
A lot happened while the blog was dead, too, the most life-changing event being me finally landing a new job last year, though more closely related to what I usually talk about on here, I also expanded my Master System and Mega Drive libraries somewhat: Secret Command, Aztec Adventure, Dynamite Dux, Captain Silver, Alex Kidd in the Enchanted Castle, Ecco the Dolphin, Jewel Master… and, yes, the topic of this blog post: Thunder Force II.

Me and this game actually go way back. It was one of those titles I used to play on an emulator when I was still the wee-est of lads, but it never quite clicked with me. I would just fly around aimlessly in the first stage and die over and over, and even when I did get to the next stage and the gameplay changed to the kind of sidescrolling affair that’s more commonly associated with the series these days, it was all way too fast and way too much for my underdeveloped brain to keep up with.
Needless to say, shoot-’em-ups were not one of my favorite genres back in the day. It’s kind of funny that they are now, though, what with me even having made one… but I digress.
I didn’t actually dip my toes into the Thunder Force series again until about a decade later, when I got myself a physical copy of Thunder Force IV — a masterpiece of a game that I regret to admit I still haven’t been able to beat yet (and it doesn’t help that sometimes it seems to glitch out on the Continue screen and not actually let me continue, even if I have credits remaining). I guess catching a glimpse of that one in my physical collection again ultimately compelled me to give II another chance… and getting a physical copy of that must’ve been a way to make sure I actually commit myself to that resolve.
Anyway, can’t spell “preamble” without “ramble”, so enough of that and more about the actual game itself.
Thunder Force II is about as transitional a series entry as it gets, coming after the first game having only overhead stages, and before the third and future games having only sidescrolling stages. This one, meanwhile, alternates between the two.
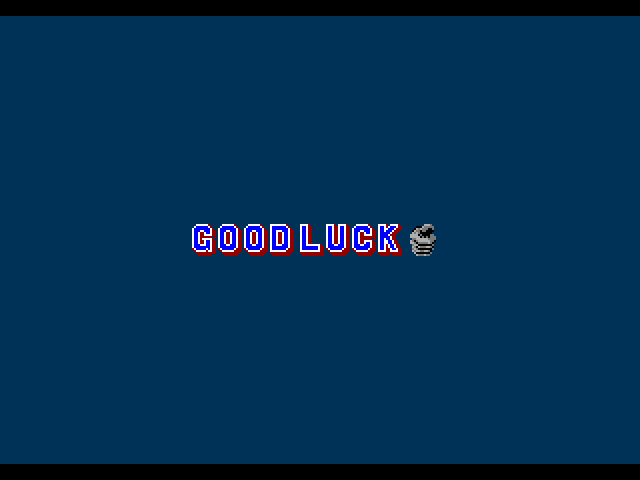
That’s what they’re supposed to be saying, at least. Good luck trying to make it out, though. Also, what is that grey thing next to the “Good Luck” text supposed to be, anyway?
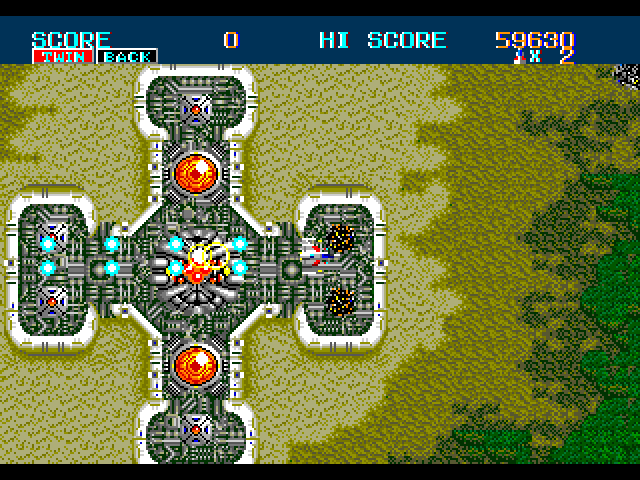
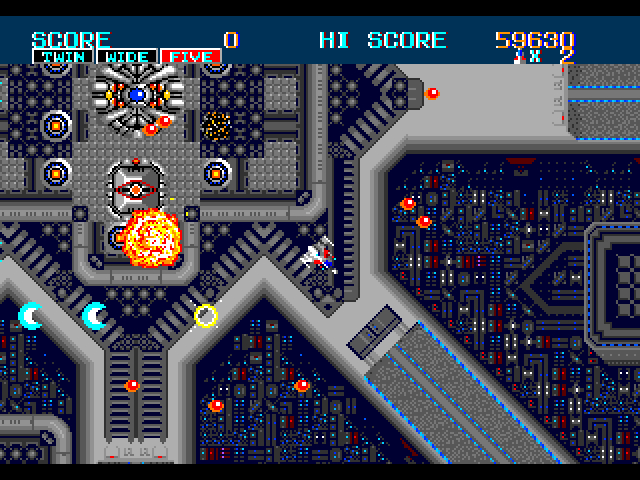
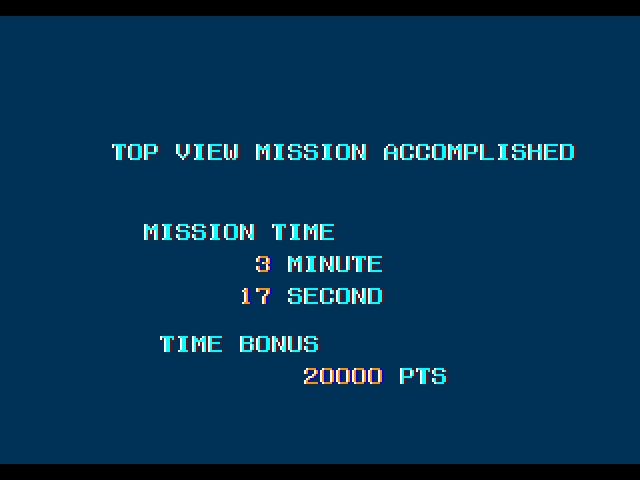
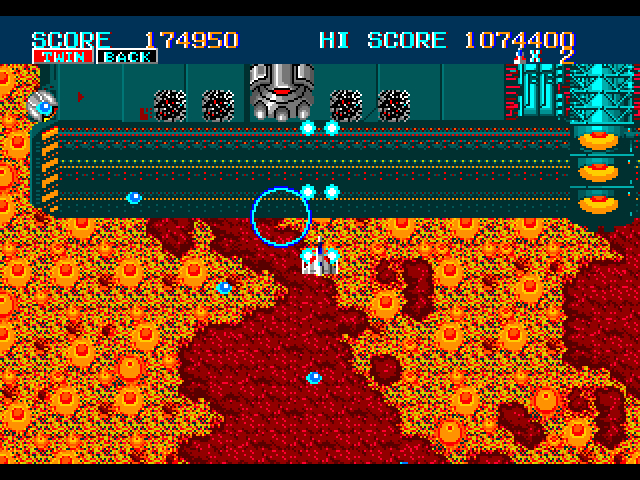
The overhead stages are kind of like Bosconian: You can move in all eight directions, firing both air-level shots and ground-aimed bombs à la Xevious, and your goal is to destroy all of the enemy bases. The faster you do so, the bigger the time bonus, with the biggest payout being a whopping 250,000 points if your clear time is under 60 seconds. Since you get extra lives roughly every 50,000 points, it’s a no-brainer that getting those bonuses is a very good thing.
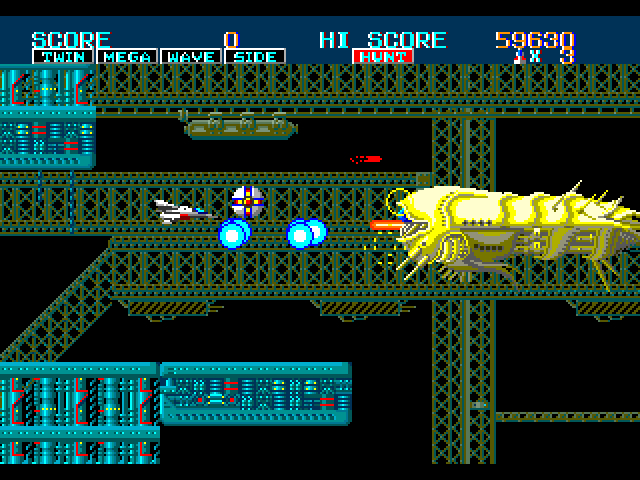
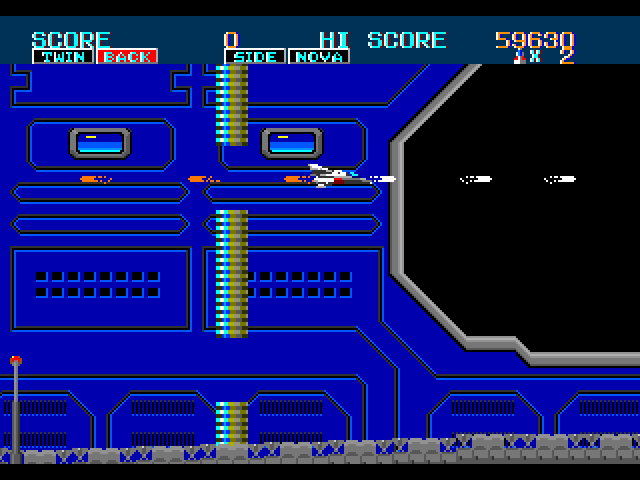
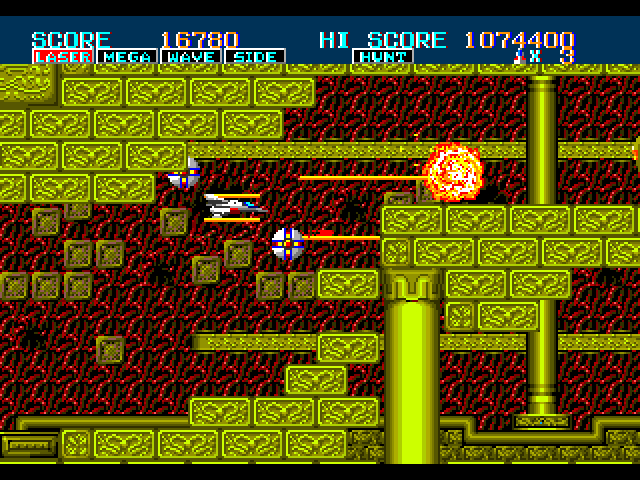
After each overhead stage follows a sidescrolling stage, which plays about how you’d expect: The level steadily (and automatically) scrolls to the right as you shoot down enemies and avoid bullets while making sure not to run into any walls (much easier said than done in certain stages). At the end is a boss, and once you destroy that, it’s on to the next overhead stage.
What is also similar to — yet still noticeably different from — later entries in the series is the way weapons work. As usual, you start off with Twin and Back shots that you can switch between on the fly. Certain enemies drop power-ups when destroyed, which can upgrade your starting shots or give you additional shot types, and you gain access to a different set of shot types for overhead and sidescrolling stages.
Now for the key difference: When you die, you lose all your power-ups, not just the weapon you had equipped at the time, meaning there’s little incentive to save your best weapons (or quickly switch to one you’re not as attached to) — use ’em or lose ’em. The only cushion to that blow is that dying in an overhead stage lets you keep your weapons for the sidescrolling stages and vice versa, but either way, get ready to rely on the Twin shot a lot. Fortunately, it actually has pretty decent damage output, despite being your basic weapon.
Another difference is in the way shields work, actually. In later entries (and, really, most shmups that have a shield power-up), they can only take a few extra hits before disappearing. Not so here: They’re straight-up on a timer. You get a few precious seconds of complete invulnerability until they wear off, which provides a surprising amount of strategy potential — or would, anyway. Power-ups in overhead stages always follow a set order (and that order resets on each new credit), so manipulating it to get the shield exactly when you need it is no easy or consistent feat, and while power-ups are 100% predetermined in sidescrolling stages, those stages move at a fixed pace, so there’s actually fairly little mileage to be gotten out of shields there, for the most part.
Still, despite these mechanics going counter to what you’d normally consider conventional, I can’t help but commend them for causing this significant a change in the way you approach the game.
And now… for the things that absolutely drove me up the wall:
You’re constantly moving in the overhead stages. Couple that with the fast and uncontrollable movement speed, and maneuvering starts to feel really twitchy and imprecise.
Your ground shot has incredibly short range, making it very risky to take out ground targets (including the aforementioned bases).
Hunter (the homing shot) gives you no ground coverage at all. It’s also kind of bad at its job when there are several enemies on-screen because it has a tendency to aim at every enemy other than the one you’re actually trying to hit.
Stages 1 and 5 have indestructible orbs that come out of nowhere and circle you, blocking your shots. They’re not an immediate danger to you on their own because they never actually try to ram into you, but they can and will prevent you from shooting down other enemies.
Hell, the overhead stages are pretty tedious in general because of how open-ended and samey they are. You can roam the map for minutes on end trying to find the last base to destroy. At least the original X68000 version gave you a minimap.
Stage 4 has shutters that will kill you unless you know where they are and your execution is perfect, and even then you might get fucked over by the fact that the seemingly insignificant street lights on the ground have collision and can kill you, too.
The overhead stages in general are a cruel joke with their parallax scrolling, especially stages 5 and 7. Power-ups may look like they’re within reach, only to vanish underneath a foreground wall as you try to pick them up.
And hey, let’s talk about stage 5 here, because this is the first major difficulty spike in the game. It’s mercifully the most linear of the overhead stages, but that’s because it forces you to navigate through tight corridors where even the lightest brush against a wall means instant death. Oh, and many of the corridors are blocked off by rocks you have to shoot through. With how fast you move, it’s very possible that you move faster than your shots can break a path through them. It’s pure, unadulterated misery throughout.
Oh, and stage 7? Not only do the bases suddenly take way more shots to destroy for no reason, the whole stage somehow manages to be even more confusing than the previous overhead ones combined. I had a particularly bad attempt once that took over eight minutes to clear this one (and any clear time beyond 5 minutes means no bonus points), which resulted in one of my notes simply saying: “WHERE IS LITERALLY ANYTHING IN THE OVERHEAD SECTIONS?????”
That… sure is a lot of raging about the overhead stages in particular, isn’t it? “What about the sidescrolling ones, then?” you might ask. Well, they’re… surprisingly reasonable, actually. They do have their bullshit points, of course — like the aforementioned stage 4, or the fact that stage 8 has a little maze right at the end where picking the wrong path will get you killed via dead end (pun not intended) — but for the most part, they’re actually quite fair, or at the very least learnable, which is probably why III and onward just did away with the overhead stages altogether.
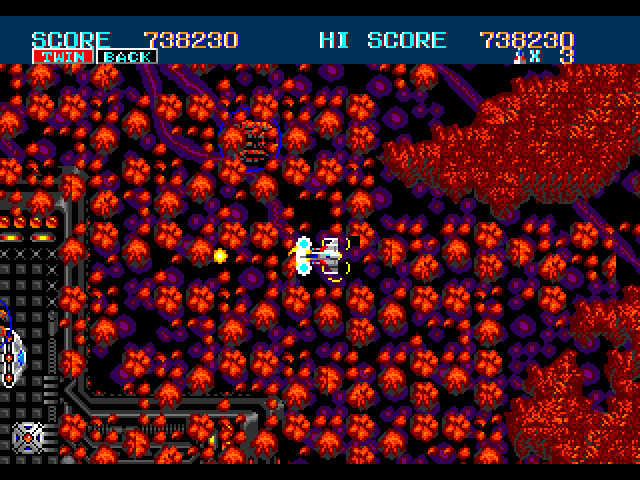
In fact, despite that bullshit section at the end, stage 8 might actually be my favorite stage in the entire game. It’s the longest, most challenging for sure, the second major difficulty spike, and it took me several credits to even begin to learn it, let alone get through to the end, but man, was it satisfying to find myself practically breezing through it in subsequent runs. The boss at the end is pretty exhilarating, too, and in fact kind of makes me have to draw on my 12 years of experience playing Touhou and other bullet hell shmups just to micrododge through the lightning-fast jets of flame it shoots out towards the end. True zen moment right there.
However, there are nine stages total, which means the final stage is another overhead one… and it plays quite a bit differently because it’s basically the entire final boss, which you slowly shoot up, one turret at a time.
Four big turrets replace the bases from the previous overhead stages, and they are nasty. Get too close, and they’ll shoot an insanely fast blue sphere directly at you. Even if you know it’s coming, it’s difficult to evade reliably while still firing shots at the turret, and it takes a lot of punishment before going down.
Did I already mention there are four of them? Oh, I did? Well, it bears repeating, then, I guess, because this is where I got completely stuck when I was first grinding out attempts last November. No amount of credits was enough to figure out a safe or consistent strat for these. It was bad enough that, when I picked the game up again earlier this month, I caved and looked up a no-damage clear… and, as it turns out, if you’re just off to the side enough, the turret will aim its spheres straight down and completely miss you every time, but you’re still able to hit it with your shots. This was exactly the ticket I needed in order to finally destroy all four of those with minimal deaths.
Oh, but that’s not the end, of course. Far from it. Suddenly the background goes dark, the giant battleship you’ve been taking apart is trying to get away, and now you’re in hot pursuit!
The gameplay implication this has is that upward movement is now glacially slow, and the battleship periodically sways to the left or right (don’t get rammed!), with your goal being to get in front of it, then pull a Luke Skywalker as you get into the trench and shoot its giant laser weapon until the screen fades to white. Evasion is practically impossible once you’re in the trench, given the constant lateral movement, so while there is a nook to hide in, it’s more likely to just get you killed trying to maneuver into it.
Truly, the best strategy available is to have as many lives in reserve as possible (if you picked up a shield immediately beforehand, even better), then abuse your post-death i-frames for all they’re worth.

While I haven’t quite gotten a 1cc yet (the second run I did to take all these screenshots ended up being a 2cc, though), I’m glad I was able to beat Thunder Force II at all for now, at least. Odds are I might come back to it eventually, too. Until I’ve gotten a Hard 1cc, I haven’t run out of things to do, and despite how heavily it rubbed me the wrong way at first, I gotta say it did start growing on me eventually.
Guess the moral of the story is that there’s many a game that seems bad at first glance, but actually becomes really rewarding and fulfilling to play if you put enough time into it to get to know it.
And if you’ve read this far, then thank you truly. I know this turned into a behemoth of a blog post, but I guess that’s just how I roll, and I might as well accept that. New posts will probably be few and far between, going forward, but I’ve learned that I shouldn’t compromise on my style and my selling points just to have a shot at something resembling consistency.
